Friday, March 29, 2013

Classroom Themes - Space

"To Infinity, and Beyond!" -Buzz Lightyear, Toy Story
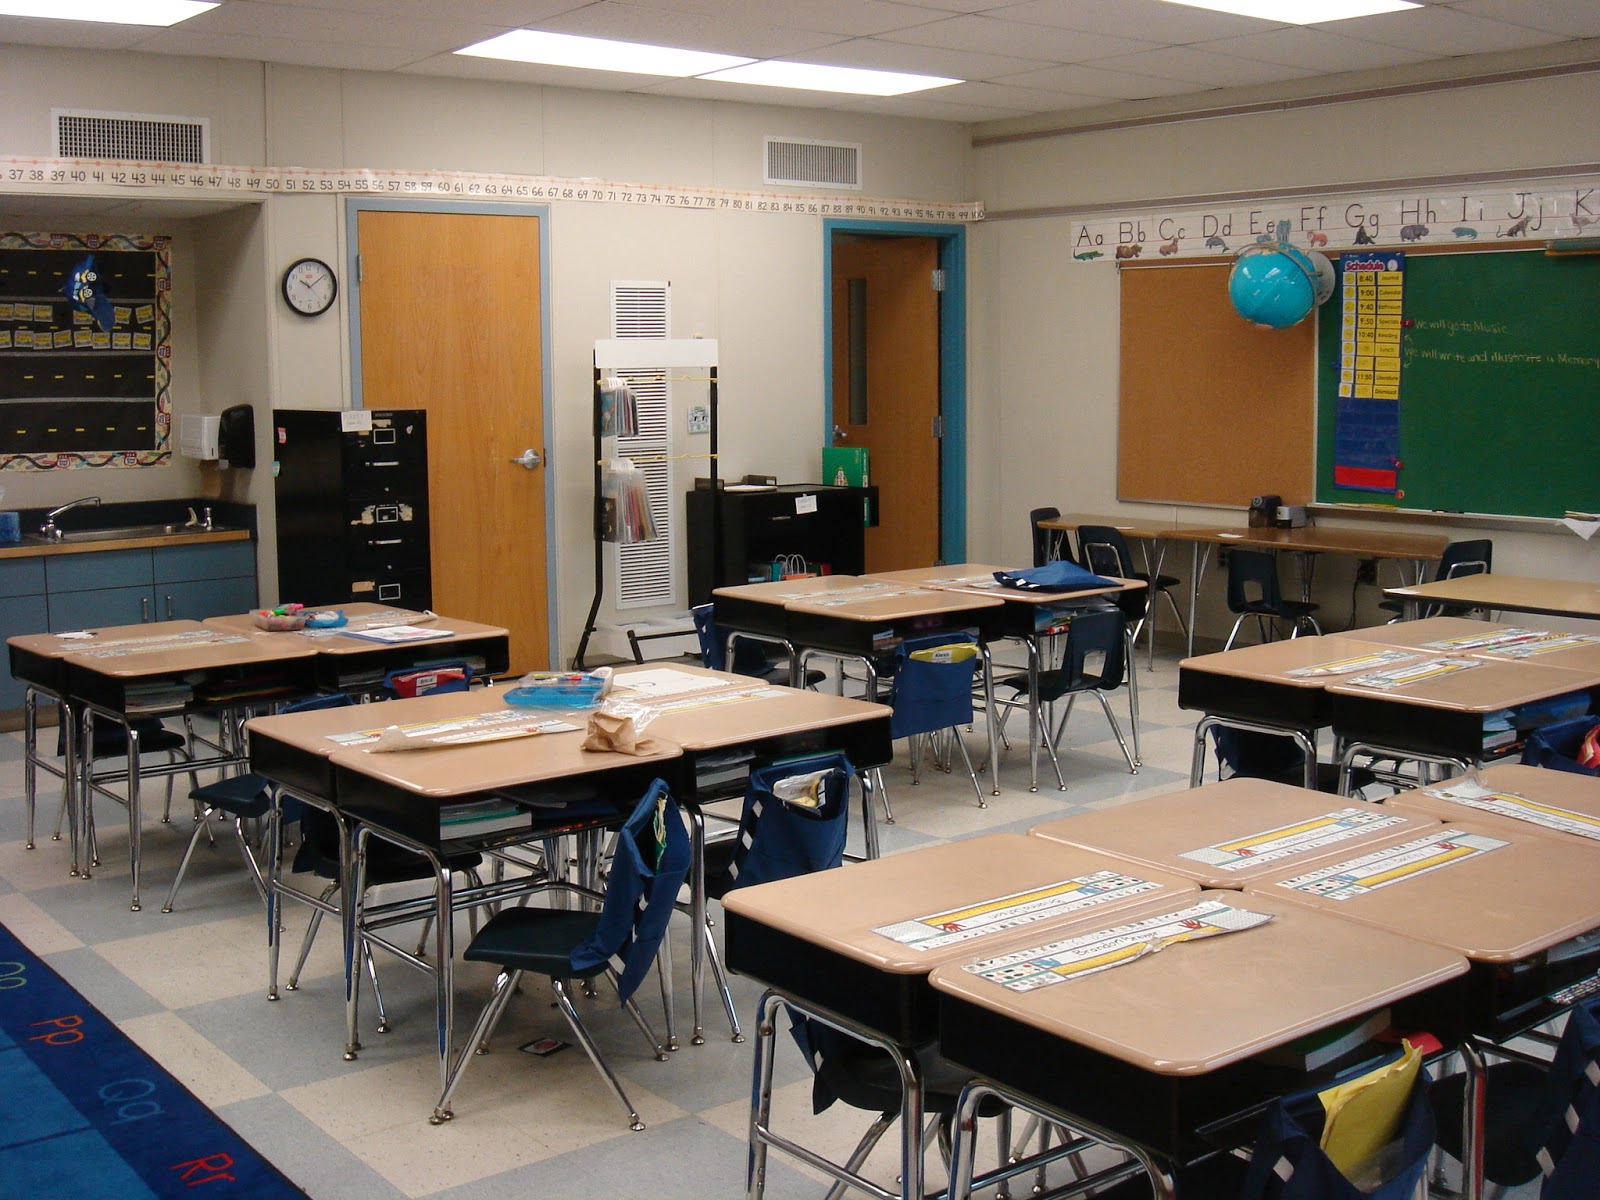
Before Pics:


After Pics:

Student mailboxes on the left were one of the best purchases that I have made.  It is worth it to get the sturdy wooden ones because they hold up perfectly for years and years.  I put student names on them by laminating a class list, cutting them out into small rectangles and using masking tape, but this hasn't been the best strategy.  Initially I attached them with scotch tape, which was worse.  I've seen people using binder clips, which I might try next year.
 
The bulletin board uses the 6+1 Traits and writing process to display the steps we use for writing.  The moon, I made out of butcher paper and drew gray craters using crayons.  I printed out the space ships and footprints using clip art and actual images of the first steps on the moon.  For the footsteps, I then labeled each with a step of the writing process (get it?) using my Cricut.  Afterwards, I laminated both parts before stapling them onto the board.  Since I used the table to meet with small groups, the ledge worked perfectly for the smaller white board I use for differentiated lessons when I'm there with students.  Over the board, I put baby toys that are space themed that worked perfectly there.
 
To the right, I had a space themed center board for "may do's" after students were done their independent reading assignments.  Their names were written on space ships that rotated to different stations daily.
 
By the sink are black buckets I bought at the Dollar Store for a buck each.  I use them for recycling.  When we do projects requiring cutting and scraps of paper that never seem to make it to the recycling bin, students get a bucket for their table and empty it into the larger recycling bin before replacing it by the sink.  It's worked wonderfully!

This was the back of the room.  I used stick on shapes for bedroom walls above the chalkboard.  I created the job board and Must do/May Do/Catch Up Work signs on the left.  My listening center books (built up from e-bay purchases) is on the right.  The rack is awesome, and was a gift from a family member.

This area is used for reading centers.  My family helped me to purchase and put together the white book shelves--which have been the best purchase/gift EVER!  They are awesome for storage, especially in an open space classroom.  The space helmets on top were purchased online.
 
To create the student job board, I used blue space ship bulletin board accents from a teacher supply store.  On each, I wrote a different classroom job.  Then, I wrote student names on a mini astronaut note pad that I bought from a teacher supply store.  They were laminated and backed with a magnetic strip.  I used a space border and a space scene setter from a party supply store for the backing.  I added magnet strips beside each stapled down space ship to rotate the astronauts to a different ship each week.
 
On top of the chalkboard, I added space themed toys to further the theme.  My bathroom and hall passes on lanyards are hooked to the board with magnet hooks (from Target or Walmart).  They were purchased from Oriental Trading and are sturdier than any I have bought or made myself (plus these are less likely to get dropped in toilets!).  I still need to replace them at the end of the year, but that is because of normal wear and tear/dirtiness.

I used a blow up solar system set to decorate the ceiling.  I made student work hooks using a large notepad with space ships and aliens from a teacher supply store that I laminated and hot glued a clothespin to before hooking it to the ceiling with fishing line and clear hooks purchased online.


Student tables were still organized by color, but instead of vowels, I change the table labels each month to reflect a 3rd grade math skill.  In the beginning, they are odd or even numbers.  Then I change them to become solutions to math problems (for example: I say "2 times 5" and table 10 comes to the carpet or lines up).  I've done clocks when we are learning time and different measurement units when we are in that unit.
 
 
I used bulletin board sets purchased at a teacher supply store over the front chalkboard to continue the space theme.

I staggered the bookshelves to create a fake entry way in my open space classroom.  I then made faux bulletin boards on the backs of the shelves for the student of the week.  Their poster went on the second half of a real bulletin board (the other half was the job board).

I used black butcher paper and space-themed borders for an entrance bulletin board.  The middle one eventually became "birthday constellations" with groups of stars based upon the months of students' birthdays.  On the left, I used student pictures behind an astronaut cut-out purchased from a party store.  The student of the week had their picture go inside the face part of the cut-out.  I also made a speech bubble that said "welcome to our classroom" to tape on the top.  On the right, I put student names on space ships (from a notepad purchased from a teacher supply store) and used my Cricut for the letters.

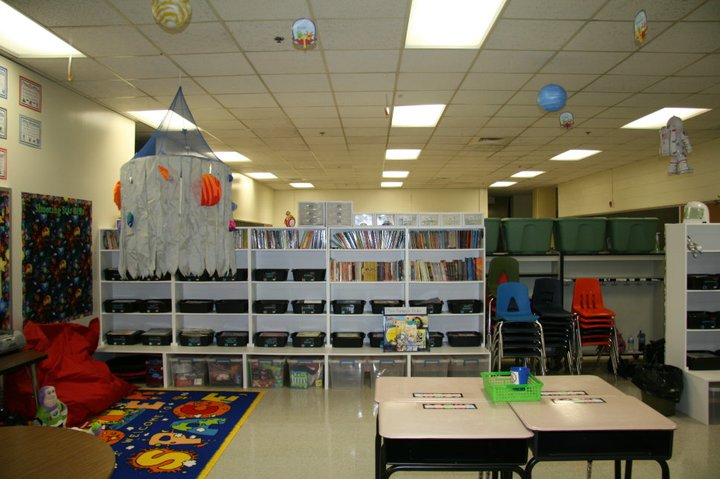
For the reading corner, I used those awesome shelves.  The black bins had labels that I created using Power Point.  I used a black space background, added gray letters to label the types of books housed in each bin, and then placed a colored dot sticker in the corner that matched the dots on my books (organized by theme/topic).  I created a faux bulletin board for student work on the wall behind the large bean bag chair.  I also used the space under the shelves for storage of fold-out chairs purchased from Target.  The space rug and Buzz Lightyear added some fun to the corner.  I also included pillows with starred pillow cases and space blankets for students to use to cuddle up with a good book.  The canopy was purchased online.
 
For extra storage, I bought large storage bins from Target for under the shelves.  I also used small storage bins for the tops of the shelves.  I labeled all of the see-through bins with Post-it stick on labels.  The green bins added some height to the rolling student cubby carts provided by the school (on the right) to help close off that open space "wall".

This is a view of that open side with the staggered shelves, used to create an entry way and "wall" to limit distractions from the classroom on the other side.

With the walls that I did have, I used a space-themed table cloth (duct taped and hot glued to the cinder block walls to create another faux bulletin board) and space bulletin board sets to create a feel for the year's theme.

 This is the view of the front of the room from the entry way.

In the reading corner, I used the bulletin board and wall space to post reading strategy posters that I found online, printed in color, and backed with construction paper for a pop of color.  I used fabric purchased by the yard from JoAnn's to use as the backing for the bulletin board and faux bulletin board.  I added a space border and star accents purchased from a teacher supply store.
 
On the table, I placed my CD player, an astronaut Snoopy stuffed animal, and a digital picture frame.  I used the frame to load pictures of books that I recommended for students.  It automatically scrolled through the pictures of the covers of these books to garner student interest.

I used bookshelves and a three-sided pocket chart holder, along with filing cabinets behind my teacher desk for extra storage since I had limited closet/storage space.  I acquired them from past teachers, yard sales, thrift stores, and as gifts from teacher supply stores.
 

Classroom Themes - 4 Seasons

The Sky's Always Blue in Room 22

Before Pics:


After Pics:

Each wall became the location of a different season.  My reading corner area and wall became Fall.  The book bins are black with labels created using Microsoft Power Point.  I used a background of colored leaves and orangeish-brown font to label each bin with the topic of the books in that bin (examples are: animals, school, nonfiction).  Each book had a colored dot sticker that matched the sticker on the label for that bin so students could match the stickers to replace the books after they were finished reading them.  I printed two slides per page from Power Point, stuck on the stickers, and then laminated the labels to attach to the bins with masking tape.

For the word wall and (later) behavior bulletin board below I attached butcher paper to the wall using staples and covered the top with a fall-themed scene setter purchased in a roll from a party store.  I added a fall leaves border and the bulletin board accents on the side that I bought from a teacher supply store.  I backed the first half of the words using orange paper and then stapled the words below the letters, printed on leaves (orange for consonants and yellow for vowels).
 
For the reading corner, I found the canopy online (hung from the ceiling using a clear drop ceiling hook ordered online).  There was also a small rug and my oversized bean bag chair, which were gifts from my mother.  I found the foldable chairs (to the side of the bean bag, against the wall) for cheap at Target after college campus supply sales.  The kids LOVE them.  There are also pillows with Halloween themed pillow cases and blankets on the bottom shelf below the books for kids to use.  I sprinkled different stuffed animal pumpkins on the shelf and in the reading corner for "book buddies" with whom students can practice reading aloud.

For the window behind my small group table, I used leaves from a craft store (fabric on a plastic vine) to staple above the window.  I bought the scarecrows and sign on sale after Fall from a craft store, as well.  For supplies, I used plastic trick-or-treat pumpkins that were on sale in stores after Halloween.

This wall was Spring.  I used a scene setter for the second half of the word wall (this time with flowers).  I also had different weather blow ups that I attached to the ceiling using those clear hooks and fishing line again.  The umbrellas and rain drops I created using laminated cardstock and fishing line.  There are clothespins hot glued to the back to hang student work from the ceiling.  I added bulletin board accents in white spaces on the wall to continue to spring feel, using butterflies.


This area is a word work center, used during reading (and also various times throughout the day).  I made it comfy using a caterpillar pillow, a small rug with letters on the turtle shell, and flower and lady bug stuffed animals--all of which seemed Spring-like to me.  Supplies were stored in bins and the black storage podium on the right.  On the closet door, I printed out reading strategies on yellow cardstock, laminated them, and taped them to the door along with bumblebees from a purchased classroom job bulletin board set from a teacher store.  I created a faux bulletin board by the classroom door by stapling up butcher paper and a Spring border (rain boots).
 
The blue ledges stuck to the side of the filing cabinet were from Lakeshore, and are neat for storing small books or center supplies.

The back wall became Winter.  On the left are focus bulletin boards for reading and math.  I backed them using a winter scene setter from a party store and snowflake borders.  The bulletin board on the left is using a plain white border and was for student work to be posted.  On the ceiling, I created student work hooks using cardstock in the shape of hats and mittens.  I attached the two using fishing line and hung them from the ceiling using clear hooks purchased online.  By gluing clothespins to the back, I was able to easily hook student papers to the mitten part.  Snowmen and small Christmas trees added to the Winter-y feel.

The front of the classroom became Summer.  I used sand pails and shovels for student work hooks on the ceiling (again using cardstock, clip art, fishing line, clothespins, and clear hooks). 
 
I used beach balls for student jobs with the bulletin board on the left under the television.  The beach balls and sunglasses were stapled to the board.  Then, I wrote student names using gray metallic sharpie on the black shade parts of the sunglasses.  I laminated them and used masking tape to attach them to the laminated sunglasses so that I could rotate the names to a different job each week. 
 
I used beach scene setters for both of the front boards.  The one on the right is for the calendar.  I created a faux birthday board on the far right using butcher paper and a border.  I used ice cream cones as the months and the ice cream scoops to stack up students' names with their birthdays. 
 
I added ant/picnic themed numbers on the bottom under the chalkboard.  I also posted various summer stuffed animals/pillows and the flamingo behind my desk.  I had little plastic sand pails and shovels from Oriental Trading that I hung from the ceiling, as well.
 
This is the entrance to my classroom from the door.  I hung the cloud and the sign from the ceiling using fishing line and clear hooks.  The faux bulletin board by the door was for student of the week posters.  The tree above the table was from a purchased set where the leaves change for each season.  They start out green for Fall.  There's an evergreen tree with cones for Winter.  Finally for Spring and Summer, the green leaves go back on the original tree.  I rotated the trees/leaves for each season as we experienced them throughout the year.  The kids' names went on the leaves and cones.


This is the view from the hallway, walking up to my classroom door and student lockers.


I created this faux bulletin board above the student lockers using a lot of time, cardstock and butcher paper, letters from my Cricut, and student borders.  A ladder and a helper are recommended to recreate this idea.
 

Classroom Themes - Under the Sea

"I am a nice shark, not a mindless eating machine.  If I am to change this image, I must first change myself.  Fish are friends, not food."  -Bruce, Finding Nemo

Before Pics:


After Pics:

There's nothing like a good reading corner!  I use my reading corner as a center after students are finished their independent reading assignments for the day's assessment and have met with me in a small group.

To make my reading corner, I used a smaller themed rug and a giant bean bag that I received as a gift from my mother one year.  It is the first thing that students are drawn to when they come into my classroom, and a great place for them to sit and relax with a book (also great for parent conferences where students or younger siblings tag along). 

I also included "reading buddies," which are stuffed animals that go along with books (hungry caterpillar) or the theme (fish - Little Mermaid).  On the bottom shelf there are pillows (Sponge Bob pillow cases) and blankets to pull out if the kids want to stretch out and get comfy.  There is also a smaller rocking chair.  The canopy overhead is hanging from a clear sealing hook and was bought online.

The books are located nearby and organized in blue bins to continue the under the sea feel.  I later created labels on power point (print out 2 per page for just the right size) to help point out the topic of the books located in that bin.  I organize my classroom library with different colored dot stickers on the corners of books that match the dot sticker on the label for the bin where it is housed.  If you laminate the labels and tape them to the bins with masking tape, they stay all year, but come off when you're ready to re-label for a new year. 

This is the calendar I used for first grade.  The blue background and undersea borders for all of the bulletin boards help pull the theme together.

To make this (faux) welcoming bulletin board (outside the doorway to my classroom), I first started by stapling blue butcher paper to the wall in a rectangle shape.  Then, I surrounded it with a wave border and trimmed any of the butcher paper that was sticking out.  I used my Cricut machine to make the letters (I like that they are a little more kid-friendly than the regular die cuts at school).  The students' names were written on under the sea critters from a purchased bulletin board accent set and stapled down.  I added the net behind (purchased at a party store for a few bucks), and then stuck in some plastic sea animals (from the party store, too) for some 3D appeal.  I just stuck them through the holes in the net to make them stay.
 

I like to give my students classroom jobs that rotate weekly.  Each student gets a job each week, but some jobs require two people (for example, bathroom monitors are 1 boy and 1 girl).  For my job bulletin board, I started with the pun heading, blue butcher paper, and sea creatures border.  For the shells and pearls, I printed out a clip art shell.  Then, I put a blank piece of white copy paper over top and traced the outline that showed through the bottom page with the clip art printed on it.  I only wanted the basic shape.  Then, I colored the shell part gray and the pink part using a colored pencil.  I copied them using a color copier and then laminated them.  I wrote the jobs on each with an overhead marker in case I wanted to wipe them off and change them in later years.  It stays on better than dry erase marker, but comes off easily with a wet paper towel.  I stapled the shells to the board.  The pearls are laminated white circles.  I used my Cricut for them, and attached them with masking tape so that I could rotate them each week to a different job, or shell.  Velcro or magnet strips would have worked well, too.


For my sink/water fountain, I put down small themed bath mats to encourage students to give each other space when they were waiting in line to get a drink or wash their hands.  They stood on a mat while they waited their turn.  If the mats were full, they needed to stay in their seats and wait until a mat was empty to avoid long lines or a bunch of students hanging around that area during the day.

By turning the file cabinet so that the long side stuck out, I had a space for students' names to be posted for the class graph.  Each day, I used dry erase sentence strips with magnet strips on the back to post a question for the day and 2-3 choices.  (For example: "How did you come to school today?" would be at the top on a long dry erase strip; below on smaller strips would be: "I walked", "I rode the bus", "I came in a car").  For some questions the last option would be "Other" or "Something else" as a catch-all.  Students' graph pieces were created by cutting pink and blue index cards in half, sticking a label with their name on the front, laminating them, and putting a magnet strip on the back.  Each day, they came in, took their graph piece, lined it up with the option they chose on my desk, and created a quick and easy bar graph that we later discussed during calendar.  In first grade, this built reading fluency, added a math component to calendar, and allowed me to easily take attendance each morning by glancing over to see which pieces were left.


I liked having focus boards for reading and math that changed depending on the unit we were on at that point in the month.  It allowed a reference for skills, and gave visitors a quick peek at what we were focusing on during the week's lessons.  One board was an actual bulletin board, but the one on the left I just created by stapling butcher paper and a border to the wall beside it.
 
For a writing center, I used a playschool mailbox for them to write letters to me on a given topic.  I would then write back to them.  I collected all of the old envelopes companies send you with credit card applications or requested responses and stickers that looked like stamps for an authentic feel as students licked the back to seal the envelopes, put on a "stamp" and "mailed" their letters to me by sticking them in the post office box slot.

A good carpet is essential for pulling kids together to read a story or gather up for part of a lesson.  Not only does it allow for movement from their desks and back, but it improves focus to pull everyone close up.  I used a stool as a computer "chair" that I could sit on both ways and easily pull out and put away.  I also used the fish counting posters under the board as a math reference that also went along with the under the sea theme.  I bought the set from a teacher supply store.

I organized tables by colors and letters (in first grade I used the vowels to label the tables).  The table bins were used for students to put unfinished work so that it didn't just disappear inside their desks.  Student name tags also pulled in the fish idea.

Every teacher uses a student work bulletin board.  I just added a pun, a border, and small stuffed animals stuck on with push pins to make it sea-themed.

Another view of the front of the room.  I used my computer and overhead cart to separate the reading corner from the main carpet.

I didn't neglect the space outside of my classroom.  In the hallway, I created faux bulletin boards and hung signs/blow up sea critters to the ceiling using fishing line and clear hooks that can be purchased from drop ceilings online or in teacher supply stores.

For the word wall, I used fish cut outs for the letters (blue for vowels, green for consonants) and backed each word with a blue piece of paper before mounting all of the words on the wall.  For the background, I used scene setters from a party store.  They are plastic-y and sometimes see-through, so I sometimes put up butcher paper underneath before stapling up the scene setters.
 
Underneath the word wall, I used a variation of the "traffic light" behavior system.  Students had fishes that stuck to the Velcro strips.  They moved up to blue for excellent behavior, or down to yellow or red for inappropriate behavior.  Each sea creature had a speech bubble that explained the consequence for moving up or down (for example, losing 5 minutes of recess time).

I also created student work hooks and bobbers (on the ceiling).  I made a template using a circle and rounded small rectangle that I just created in Microsoft Word.  I then used red and white pieces of cardstock for the bobbers and gray for the hooks.  They are attached by using fishing line and a sewing needle to "tie" them together.  Another loop of fishing wire was strung from the top to attach them to clear hooks from the ceiling.  Student work is attached onto clothespins that were hot glued to the back of the hooks to look like they had been "caught".  I also decorated different sections of the ceiling with blow up sea animals from party stores.

I used more of the netting and sea animals behind my teacher desk for a display for student notes and pictures that they gave me throughout the year.  I used the counter and bookshelf for storage and organization of lesson materials.

This is the second half of the word wall over the sink.  I also posted another alphabet.  I used the colored drawers beside my desk for additional storage.